Shutter speed, ISO and Aperture make up the three sides of the exposure triangle. They together determine the amount of light that reaches the film (or sensor in DSLRs and mirrorless cameras), and they have a huge impact on the quality of the final image.
If you are shooting with a mobile phone, or using a camera with auto mode, there is no need to adjust Aperture or any camera exposure settings, as the camera processor will adjust them according to the shooting conditions, specifically the lighting conditions. But professional photographers do not prefer to rely on auto mode; they prefer to use manual mode as it gives them better control over the quality of the photos. Some mobile phones even provide some control over exposure settings, although it is a digital control in contrast to the optical control used in professional cameras.
What is aperture?

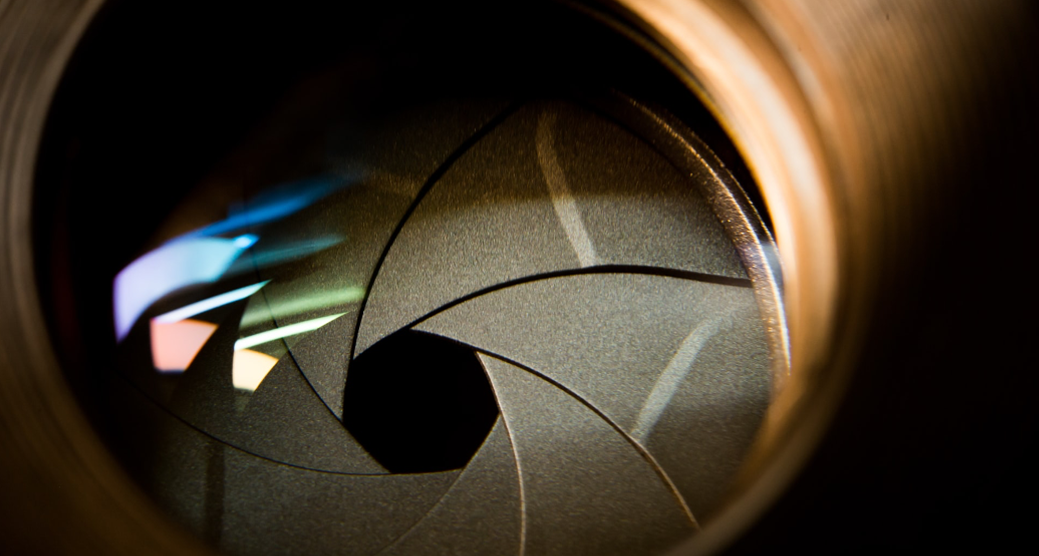
Simply put, an aperture is a hole through which light travels through a camera lens to the sensor. When the photo is taken, the shutter opens, allowing light to enter the lens, then the sensor, and closes again. The wider the aperture, the greater the amount of light that reaches the camera sensor, and also the shallower the depth of field (as we will see later).
Camera lenses can be divided into two basic categories: prime lenses and zoom lenses. Zoom lenses allow the photographer to control the focal length of the lens -within the range allowed by the lens- while prime lenses have a fixed focal length. This also applies to the aperture of the lens, as the aperture can be controlled in the zoom lenses, while it is not controllable in the prime lenses.
If you are using a lens that supports changing the aperture, most modern DSLR and mirrorless cameras offer several settings for controlling the aperture:
- Full automatic mode: Often abbreviated P or Programmed Automatic settings mode. In this mode, the camera adjusts the aperture and other exposure settings on its own depending on shooting conditions without user intervention.
- Aperture priority: Often abbreviated A or Av. This mode gives priority to the lens aperture, where the user adjusts the preferred aperture through the main control dial, and accordingly the camera adjusts the rest of the exposure triangle settings. This mode is intermediate between the full automatic mode and the manual mode, so it can be considered a semi-automatic mode.
- Manual mode: Often abbreviated M. In this mode, the photographer sets the preferred values for aperture and the rest of the exposure triangle controls.
Among the semi-automatic modes, there is also the shutter priority mode, often abbreviated S, and as it is clear, the user in this mode sets the shutter speed while the camera adjusts the rest of the exposure triangle controls.
Aperture values
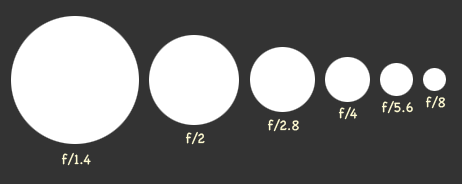
Aperture values are indicated by the letter f followed by a slash / then a number, e.g. f/1.4, f/2.8, f/5.6 and f/8 are common aperture values on DSLRs and mirrorless cameras. It is also common to be indicated by numbers only, so that the previous values become: 1.4, 2.8, 5.6, and 8.
It is worth noting that, the higher the number, the smaller f-stops, as the aperture of f/8 is narrower than the aperture of f/1.4.
Apertures of f/1.8 – f/5.6 are considered wide apertures (giving a shallower depth of field); f/8 aperture is considered intermediate, and f/11 – f/32 apertures are considered narrow (giving a deeper depth of field).
Aperture effect on photos
The direct and main effect of the aperture is to control the amount of light that enters the sensor, as we mentioned above. The f/1.4 aperture is wider than the f/8 aperture; therefore it will allow more light to enter the sensor; thus, we will get a brighter photo. That is why a wide aperture is used under poor lighting conditions to obtain the largest possible amount of light.
This is not the only effect of the aperture, as the aperture also controls the depth of field, which is the part with sharp focus in a photo captured with a camera. Wider apertures have a shallower depth of field, so when shooting a variety of subjects, the lens will create a photo in which some of the subjects are in focus while the rest of the photo (often the secondary objects around the main subject or background) will be out of focus, producing a lovely bokeh effect as in this photo:

On the other hand, narrower apertures produce images with a deeper depth of field, meaning that all subjects in the photo will tend to be in focus regardless of the distance between them and the camera.
Shallow or deep depth of field is not a matter of better or worse in photography, as some shots need a shallow depth of field to show and contrast some objects. In other types of photos, the photographer needs to have all the objects sharp and in focus.
It is worth noting that, contrary to popular belief, a narrower aperture does not mean sharper photo; it only means a deeper depth of field. The best photo sharpness appears within a certain range of apertures, usually between f/8 and f/11.
It is also worth noting that the depth of field is also affected by the focal length; for example, an aperture of f/1.4 on an 85mm lens will produce a shallower depth of field compared to the same aperture on a 24mm lens. The depth of field is also affected by the distance between the lens and the objects being photographed.
Which aperture should I use?
The short answer: according to the photo subject, lighting, and shooting conditions. But, in general, you should use the following rules when choosing the aperture of your shot:
- Lighting conditions: In general, we use wider apertures when lighting is poor, and vice versa.
- Photo type: When you want to focus on a specific part of the photo and get a bokeh effect, for example in portraits, you will need a wide aperture, and vice versa, when you shoot a building or a nature scene, for example, and you want all the subjects in your photo (for example, mountains and trees) to be sharp, you will need a narrower aperture to get a deep depth of field as in the photo below.
- Shooting with or without a tripod: When you shoot without a tripod, you will most likely use a fast shutter to “freeze” your object, so you will need to raise ISO or use a wide aperture. The second option is more preferable to avoid the unpleasant side effects of grainy/noisy photos.

Finally, choosing the right aperture may seem difficult at first, but with practice, practice, and a lot of shooting, you will learn how to quickly choose the appropriate aperture for the subject of your photo. The important thing is not to get frustrated too quickly and start relying on automatic mode in all your photos!
Here at Photolet, we offer a variety of highly specialized training courses for photography enthusiasts who aim to boost their photography skills, our training courses focus on the practical aspect of photography, i.e. will will teach you how to use cameras, how to adjust camera settings, photography lighting rules, how to use photography accessories and how to use photo/video editing software.